WordPress Cloudways Migration Plugin
With the WordPress Cloudways Migration Plugin, you can migrate your existing WordPress website with minimal effort.
In this guide, we will walk you through the steps on how to migrate your WordPress website with the Cloudways Migrator Plugin.
-
Step 1: Log in to your Cloudways Account
The first step of the process is to log into your Cloudways account where you should see your “Server”. If you don’t have one, launch one now.
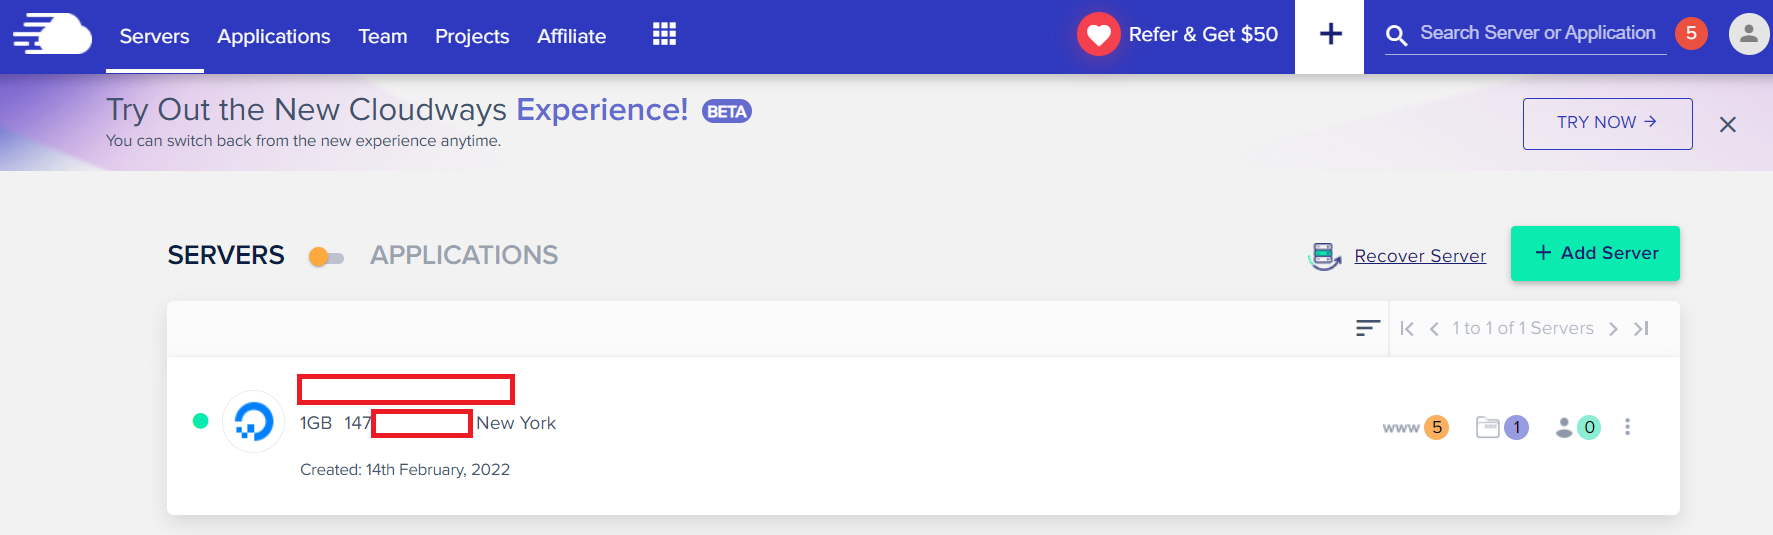
Your server will take about 7 minutes to launch.
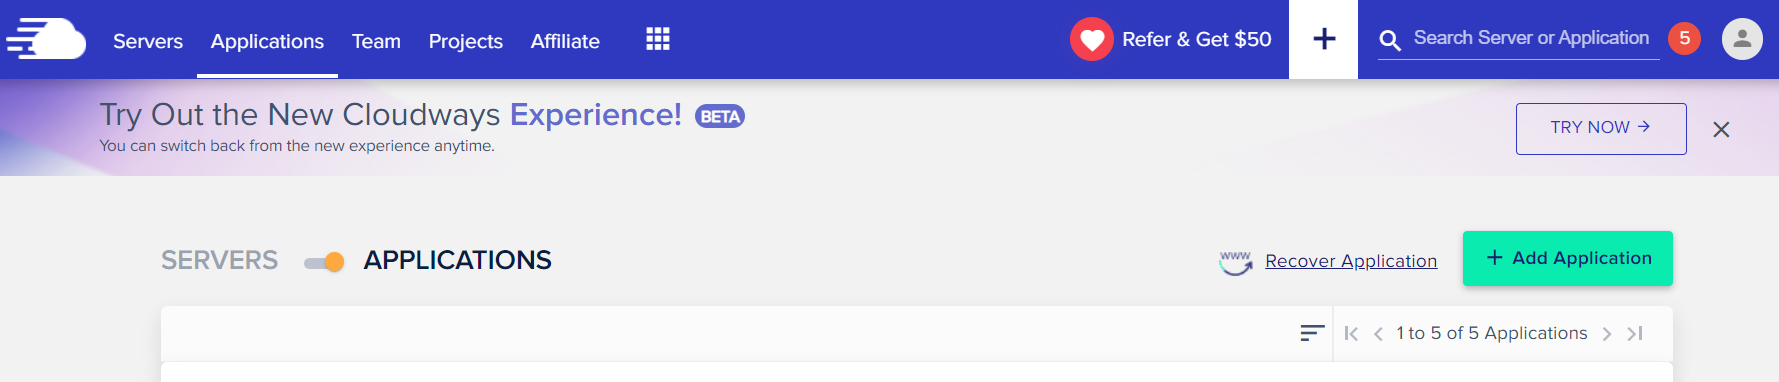
Once it has launched, click on Applications and then Add Application (applications are basically just websites).
*Launching the application takes about 2 minutes
Log into Your WordPress Site:
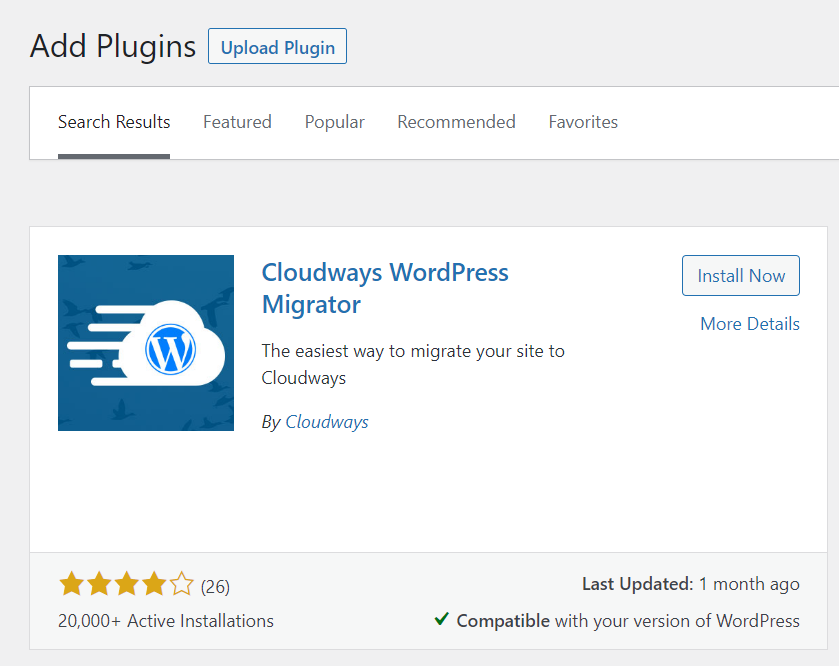
While the application is being added, log into your original wordpress site (the one you want to migrate).
yourwebsite/wp-admin/ and install the Cloudways WordPress Migrator Plugin
Back to Cloudways:
Once your application (website) has launched, you will see your access details:
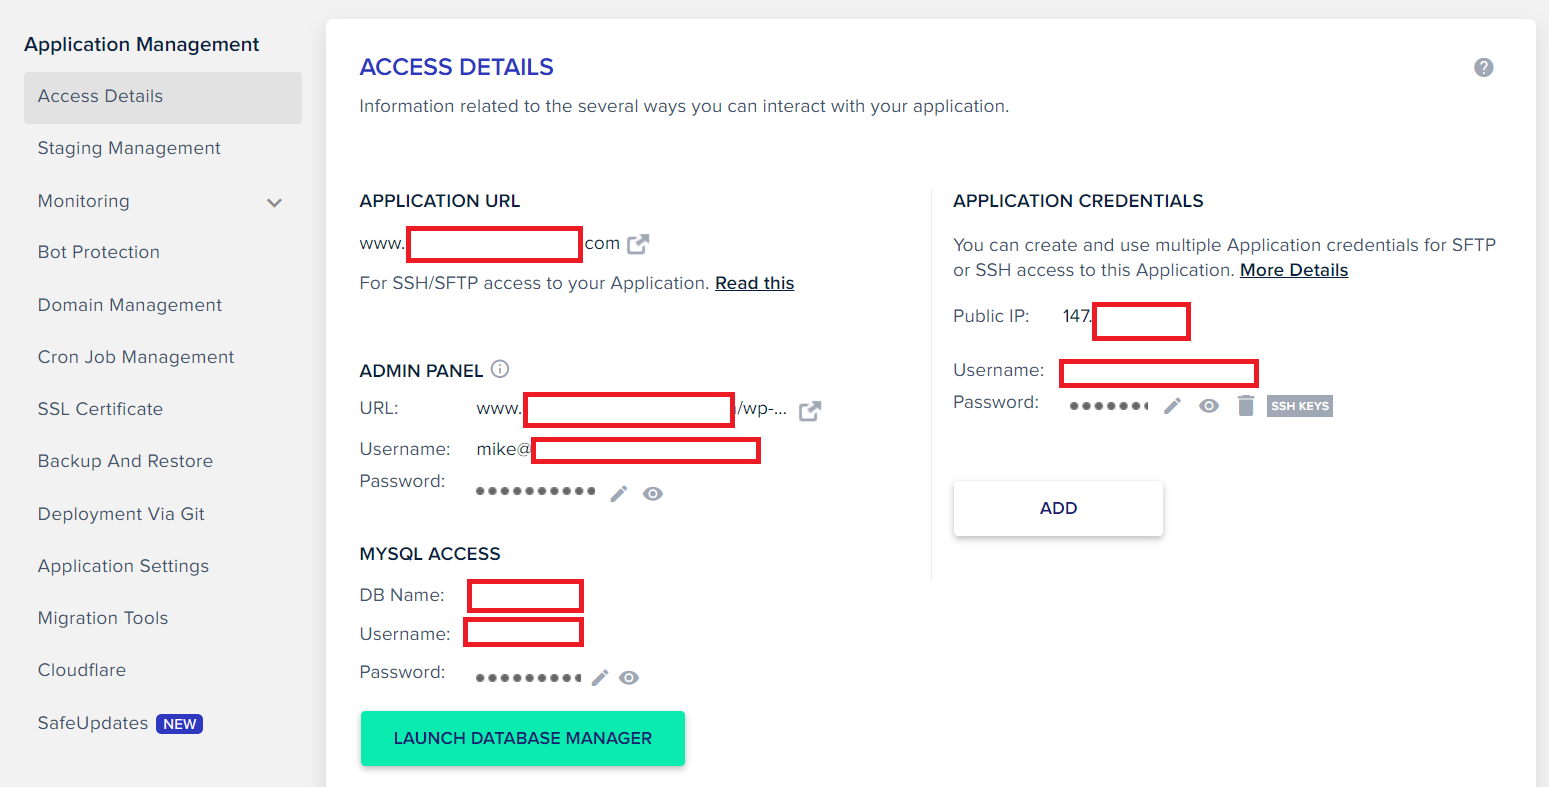
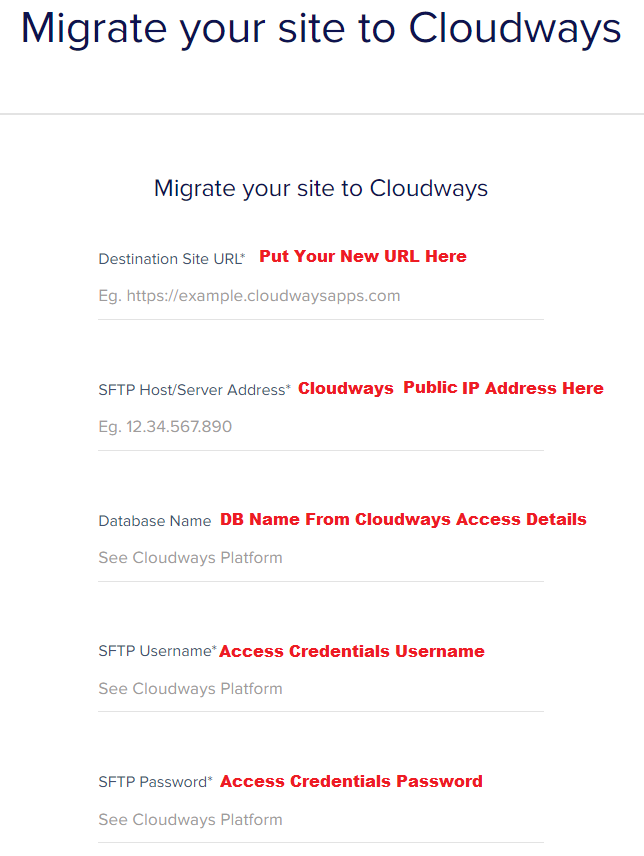
Put these details into the Cloudways WordPress Migrator Plugin
Your destination URL is the one on the new Cloudways Server and will be something like this:
wordpress-4323579-176454.cloudwaysapps.com
Create your application credentials for SFTP on Cloudways and use that for the SFTP Username and Password.
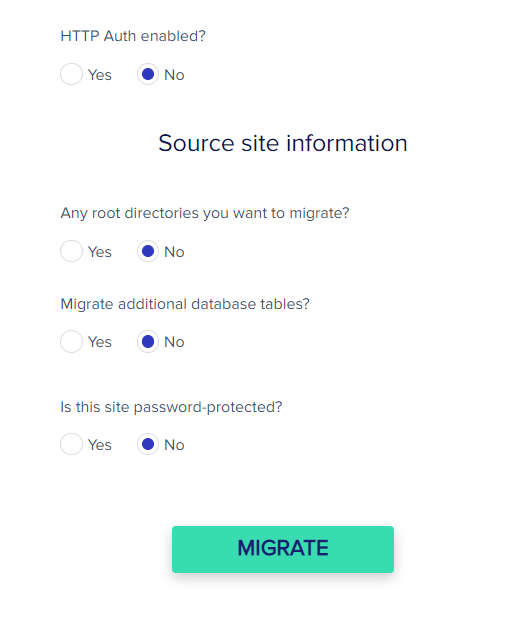
Start Migrating
Once all your data is in, click on Migrate.
*Don’t worry, your original site is still live in the original location, this is moving a copy of your site to the Cloudways server.
Migrating takes up to 4 hours and you can close the window without interrupting the process. They will email you when it has finished and this will not affect your current site.
Once the Migration is Complete, Test your website with Cloudways Hosting:
Now you have a version of your site on the Cloudways servers. You can test out the speed and log into wordpress and see if you notice a speed difference.
Your site is still with your old hosting provider so if you want to continue with the migration, now it’s time to point your url (domain name) to your Cloudways server.
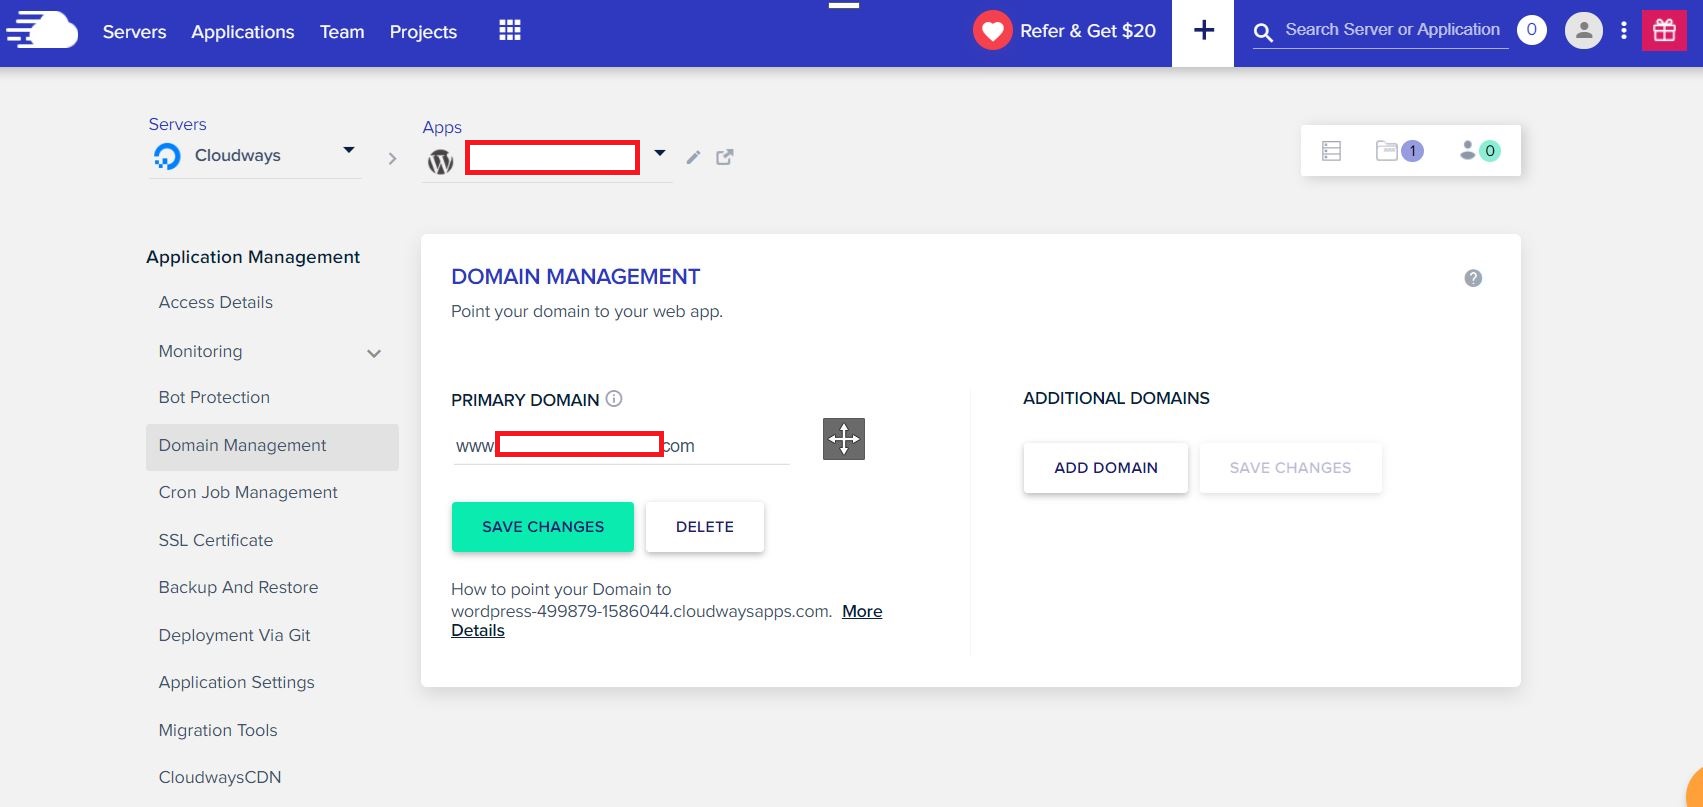
How to Point Your URL to Your Cloudways server:
First go to Cloudways – Domain Management – add primary domain – input your website url.
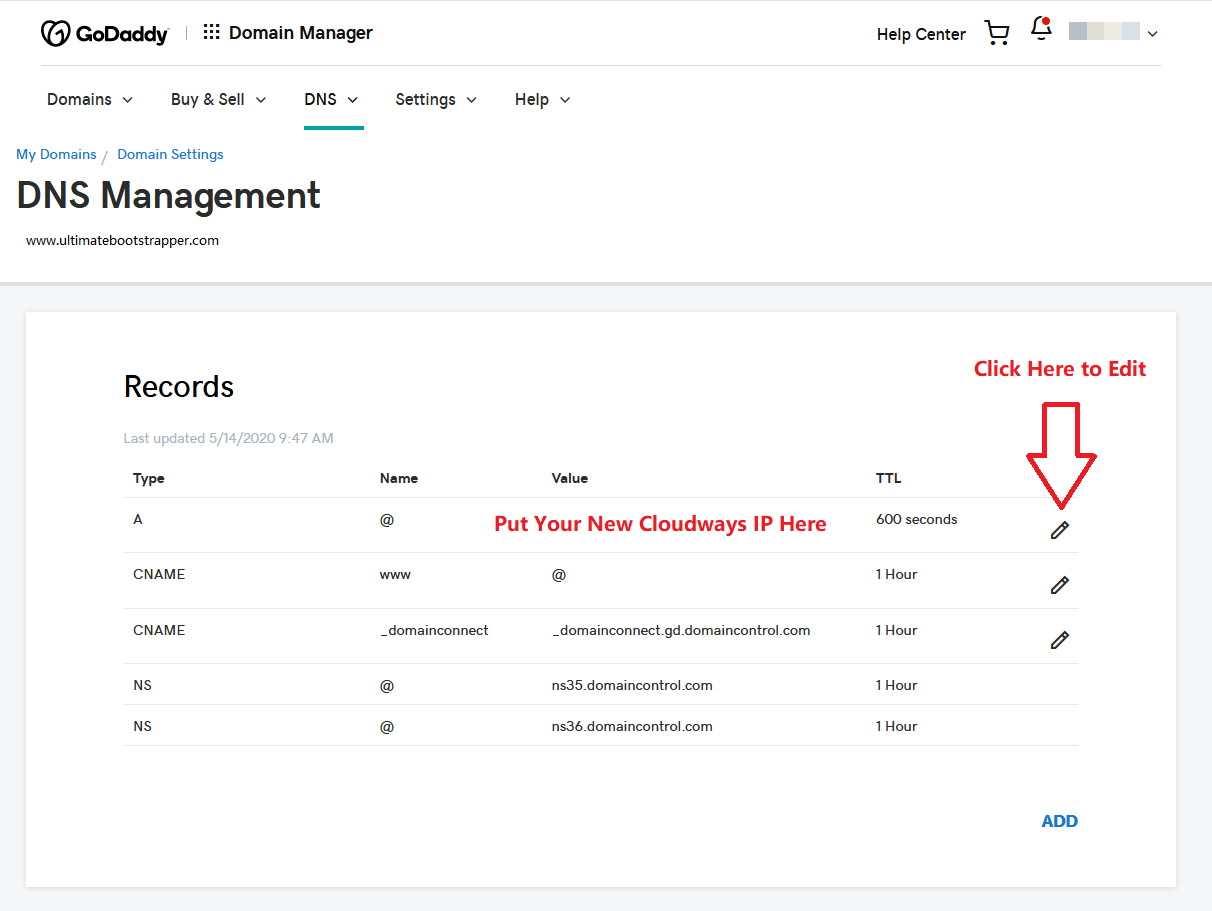
Change A (IP Address) Records:
First, access your Cloudways Account to get your New IP Address. This is the same Public IP Address that we used for the Migrator Plug-in.
Input Your New IP Address
This process is the same from Namecheap, GoDaddy or any other Domain Resgistrar.
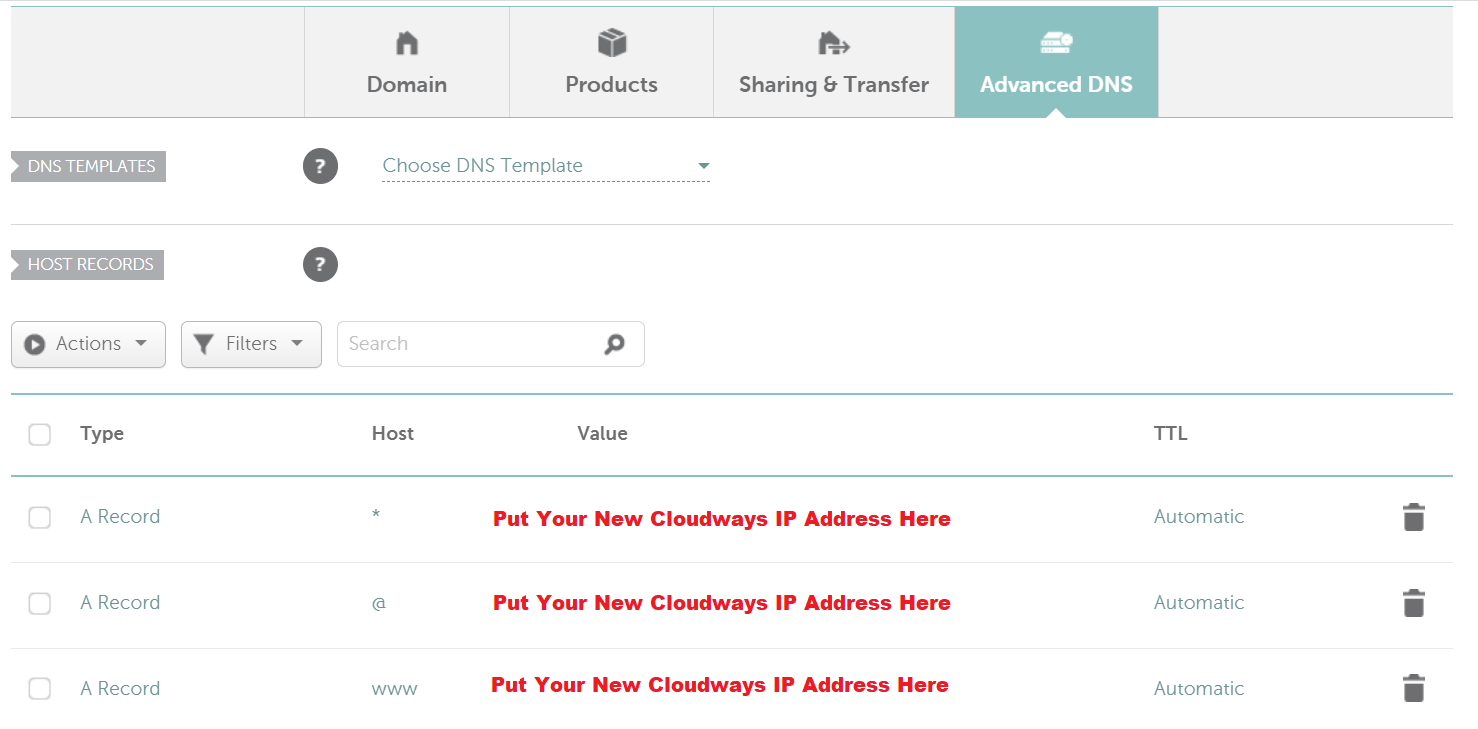
NameCheap A Records Example:
Go to Domain List, Advanced DNS and Input Your New Cloudways IP Address:
Cloudways Migration Tool
Once you have completed the steps above, you can now access your WordPress website with Cloudways. You should also make sure that everything is functioning as expected and test different features to ensure that your migration was successful. Migrating a WordPress site using Cloudways Hosting is a simple process and can be done quickly and easily, allowing for an effortless migration.
If you don’t want to use the migration tool or migrator plugin Cloudways will also migrate your site for free! Click here to contact Cloudways.